
So with half term looming I thought I would share one of the crafty activities I did with my kiddies (and hubby) during the summer holidays which may be something you can try with your kids over the week off from school!
I actually really enjoyed doing this with my two and didn’t find it too traumatic!
What you will need
5 loo rolls per snake (I think this is a good minimum – feel free to do more!)
Poster Paint
One pipe cleaner per snake (This is for the tongue, so we used pink, but the choice is completely up to the individual)
4 split pins per snake (more if you have additional loo rolls)
Googly Eyes
Pom Poms
Feathers
Or any other creative knick knacks that’s you may wish to put on your snake for decoration
If you want to add a rattle (which I did) you’ll need one additional loo roll and some rice!
I found loads of wonderful pins on Pinterest for this kind of craft – but didn’t find any others using split pins and I am pleased we did use them as it gives the snake more movement!
So to start with we covered the floor with newspaper and got all our poster paints out! Selected the colours we wanted and got to painting our loo rolls
 I think my Pink One would have happily painted loo rolls all day, my Blue One on the other got a little bored… ssshhh, don’t tell the kids I said that, it’s known as the ‘B’ word in our household! Though we managed to do the last two in a fun way with him, where he’d mixed the colours on his paper plates we were able to roll the loo rolls through the paint which he enjoyed doing, and it was nice and quick!

Sharing all our artistic work!

Whilst the loo rolls were drying I worked on the tongues and rattles…

All I did was cut my pipe cleaner in half (as it was quite long) then folded the pipe cleaner in half, then make an ‘M’ shape which would become the fork of the snake’s tongue, then pinch the whole thing together and twist! Tah-Dah – a snake’s tongue!
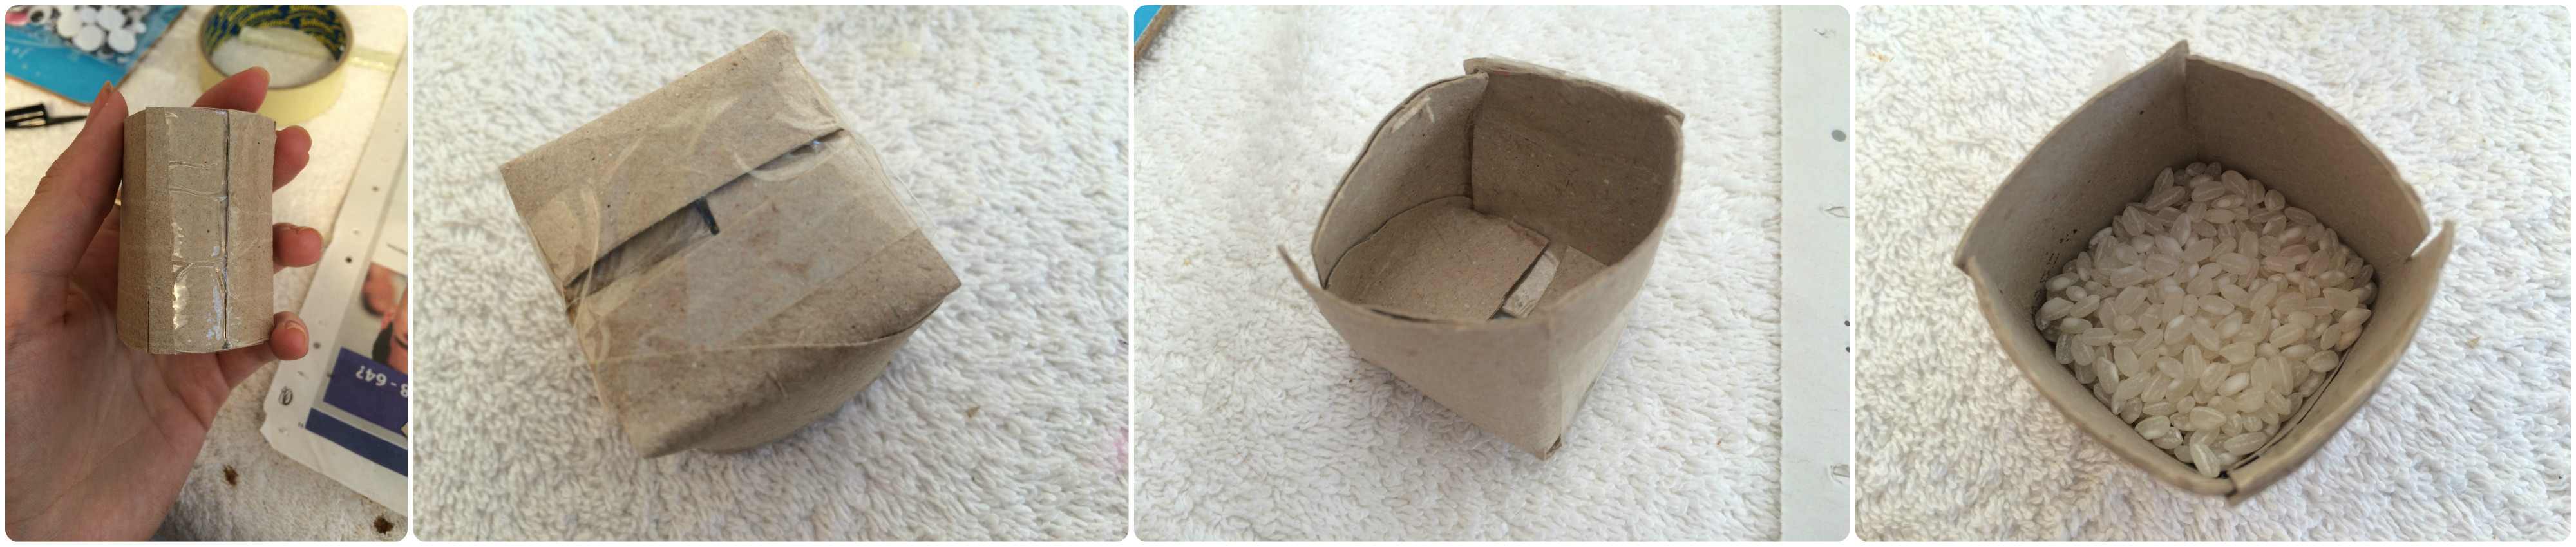
I can’t remember the exact measurements I used for the lengths of the cuts to make the rattle box – but I ‘squared’ the loo roll and made four cuts top and bottom. I taped one end closed and put the rice in – I learnt for a good rattle less is more with the rice – and then taped it closed, ready to insert into the snakes tail!
Once the loo roles were dry I cut angled sections off each end, put a hole punch in the centre on each side (except the face, you only need a hole at one end) ready to join them together.

With the tails, I did a slit down each side, folded to make a triangle each side and then stuck them together to make a point – once dried I inserted and stuck in the rattles.

Then using the split pins I put the snakes together, getting the kids to select what order they wanted the rolls to go! Then I stuck in the tongue.
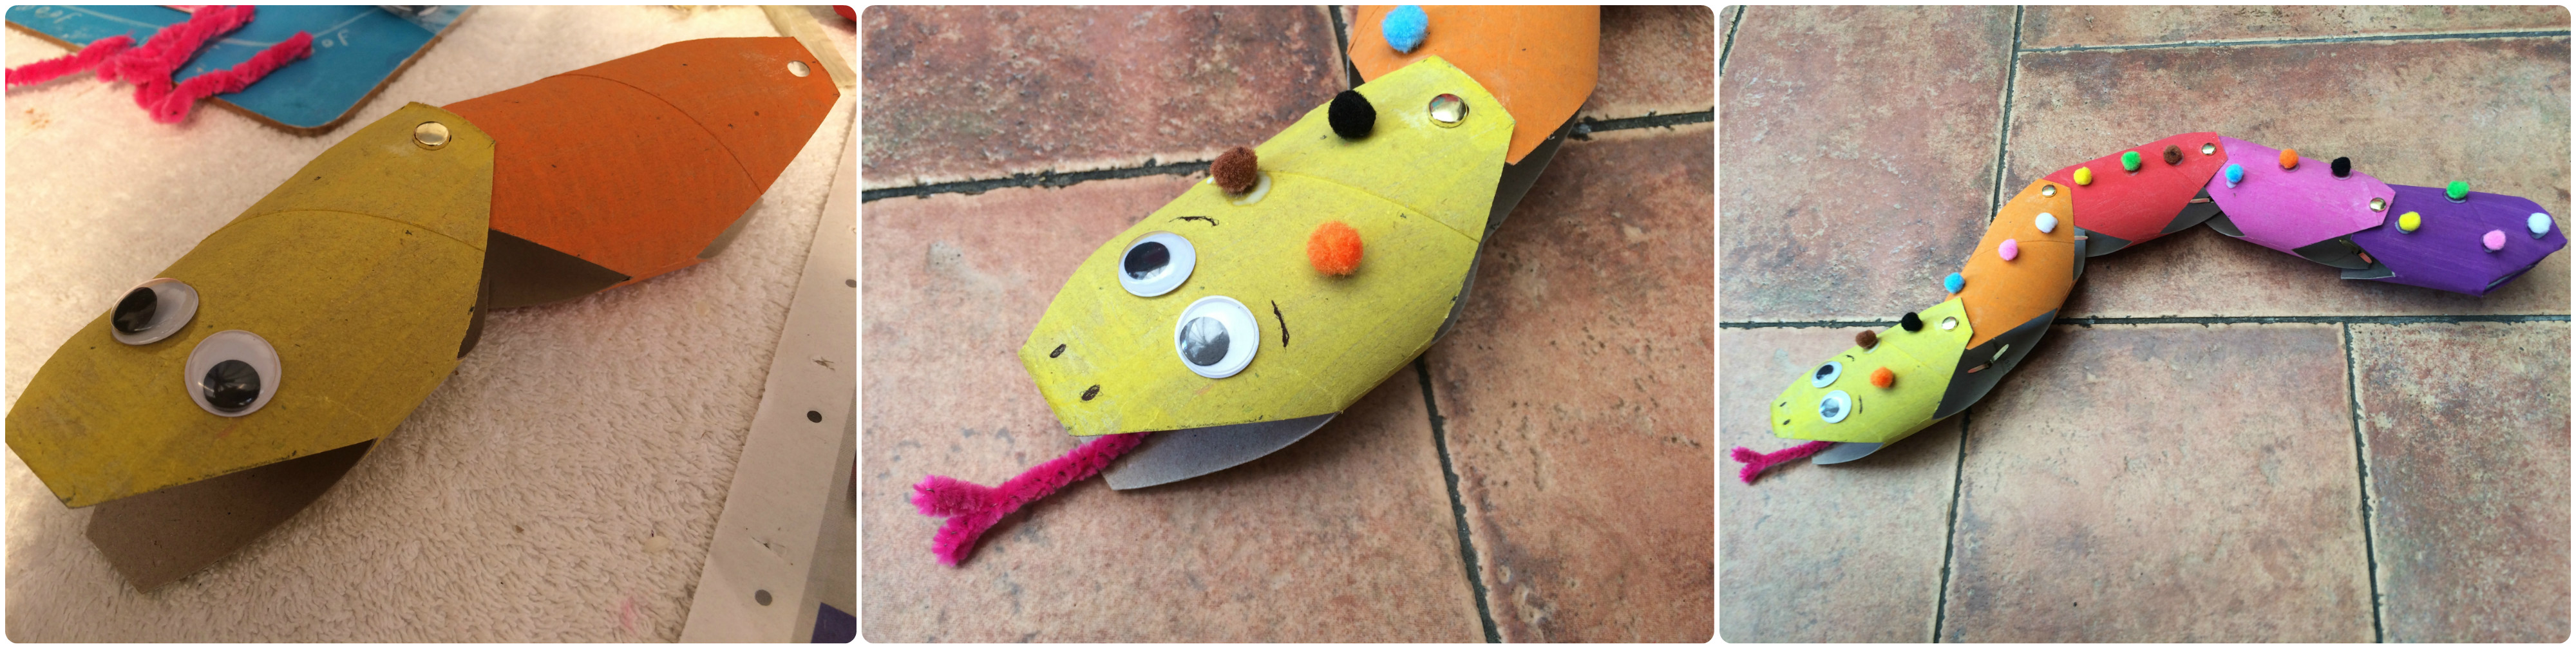
The kids then chose what size eyes they wanted and then what additional embellishments they wanted to decorate their snakes with.
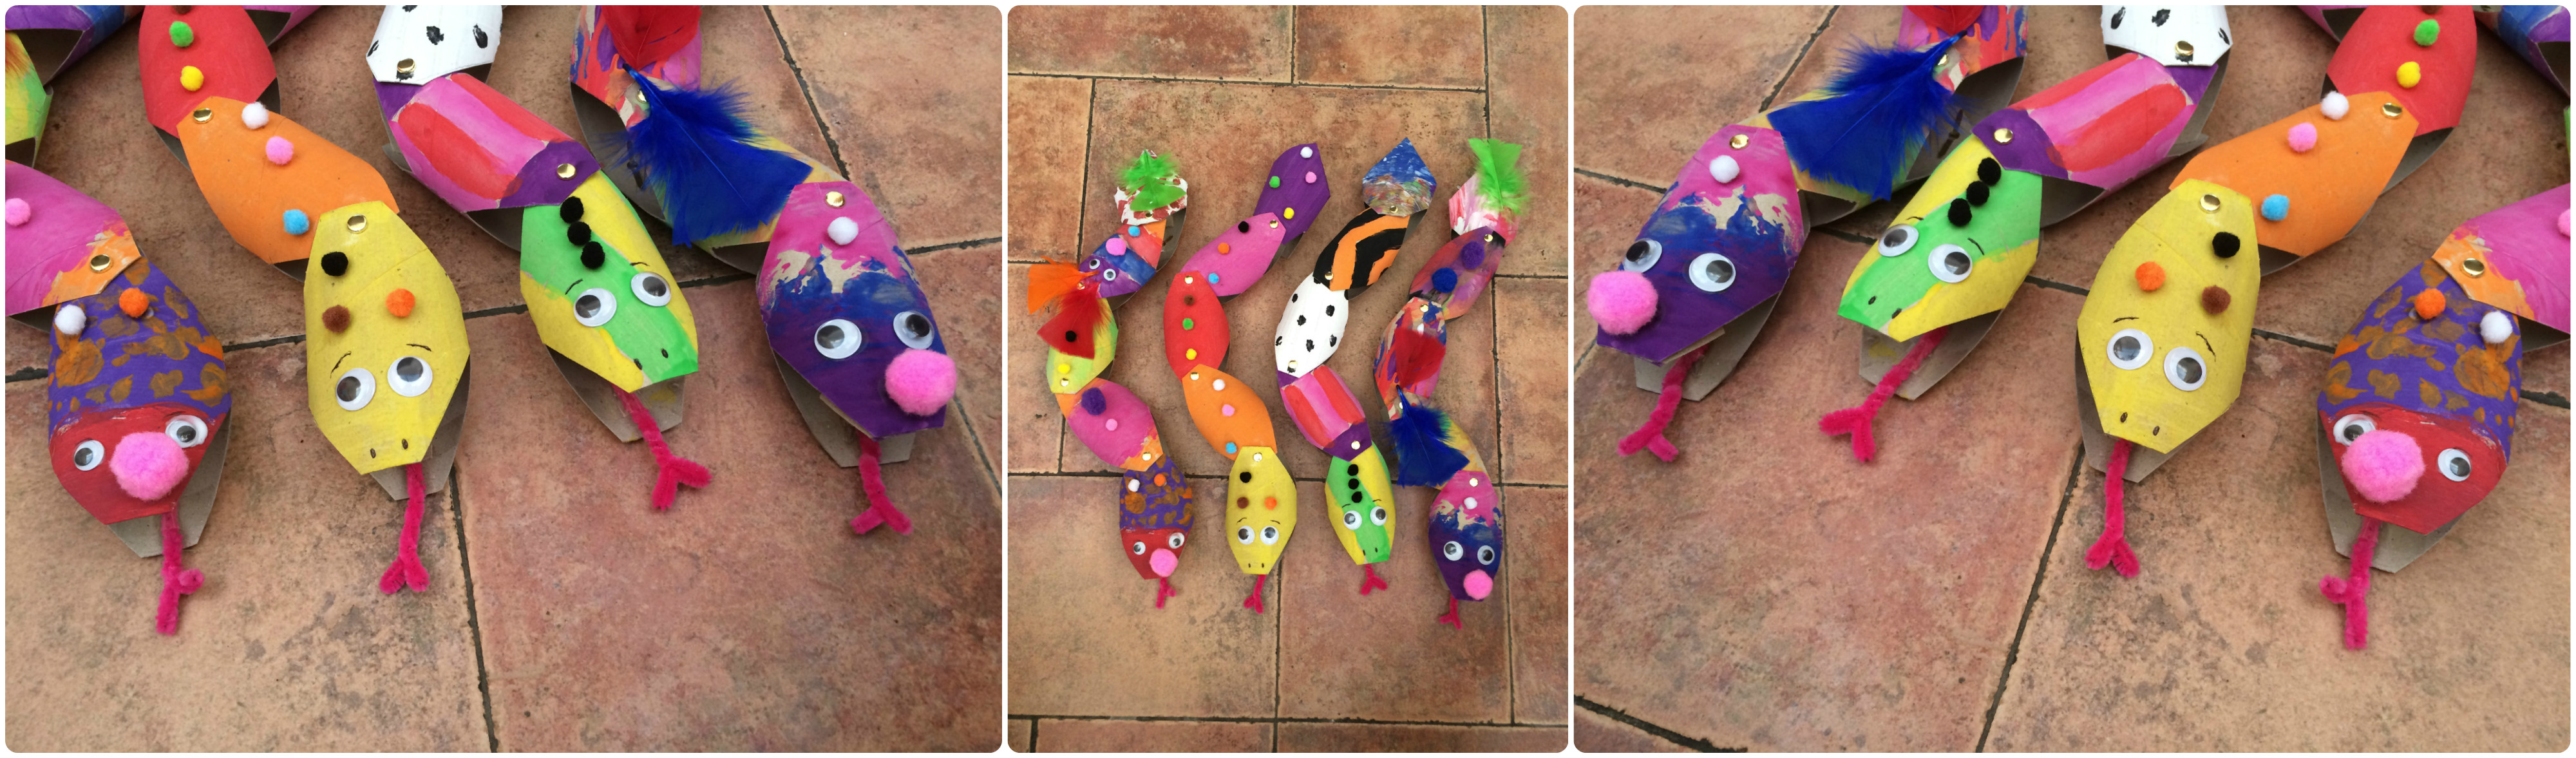
Voila – a family of articulated, embellished and rattling snakes!!!
Let me know if this post helped you make snakes with your kiddies and I’d love to see some photos of your loo roll snakes!
Please, like, share and comment on this post! 🙂 xxx
